Turtle Ornament
Visit WelcomeHomeCustom
Cut / File on your Laser
Visit WelcomeHomeCustom
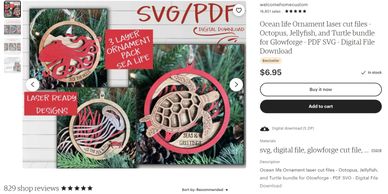
Robin of welcomehomecustom has incredible designs on her page - and this one is no different. The file actually includes 3 different designs, but we focus on the Turtle one for this project. Her designs are always well done and she has a text document explaining it in great detail for ease of use - from beginners to experts! Save 20% on this file if you use this link !
(It auto applies the link, you will notice a banner at the top of the page confirming it)
Best glue for the job
Cut / File on your Laser
Visit WelcomeHomeCustom
.JPG/:/cr=t:19.35%25,l:0%25,w:100%25,h:80.65%25/rs=w:388,h:194,cg:true)
I tried a few different glues, and in the end - this one was the best for this application. It gives you about 2 seconds to be able to move it, and you can take the pieces apart up until about 20 seconds (with some elbow grease). After that, the pieces would be together permanently. Gorilla Super Glue (Blue Cap) - NOT the Brush (Yellow) or Gel (Green)
Cut / File on your Laser
Cut / File on your Laser
Cut / File on your Laser
.JPG/:/cr=t:0%25,l:0%25,w:100%25,h:100%25/rs=w:388,h:194,cg:true)
I chose 3 different color woods, and not painting them - allowing the beautiful wood grain to do all of the work. In order (front to back), the wood is: Walnut, Maple, and Cherry. Most of this was done with Glowforge Proofgrade wood, aside from some Walnut that we purchased from Smokey Hill Designs.
Apply glue to last layer
Apply glue to last layer
Cut / File on your Laser
.JPG/:/cr=t:7.63%25,l:0%25,w:100%25,h:84.75%25/rs=w:388,h:194,cg:true)
Start with the front side of the last layer. (make sure it is the front, it is easy to flip over and not notice) In additional to small glue beads around it, I chose to put a single dot in the coral, just left of the center in that area that offers a thicker section. This single dot helped tremendously to eliminate "chatter" between the pieces once fully assembled.
Apply Second Layer
Apply glue to last layer
Apply Second Layer
.JPG/:/cr=t:7.63%25,l:0%25,w:100%25,h:84.75%25/rs=w:388,h:194,cg:true)
Make sure you have a good, clean work environment with minimal distractions. For this part I chose to use the hanging circle as the first point of contact and alignment. After, I quickly felt around the bottom, under the words and ensured I was even from about the 4 to 8 o'clock positions. I then lightly pressed for about 10 seconds.
Apply Top Layer
Apply glue to last layer
Apply Second Layer
.JPG/:/cr=t:11.54%25,l:0%25,w:100%25,h:76.92%25/rs=w:388,h:194,cg:true)
The last layer (top) you will flip over and apply small beads around the circle, but there are also additional places you can put a dot - from the face, to each of the front flippers. The trick for the small beads around the circle is to keep the glue hand moving (to keep the dots smaller)! I concentrate on the left side of the shell and inside edge of right flipper for alignment of the top to the middle, and that worked very well.
Final Results
How they look on a Tree
$600 in one day!
-0001.JPG/:/cr=t:5.36%25,l:0%25,w:100%25,h:89.29%25/rs=w:388,h:194,cg:true)
This piece looks gorgeous in photos - and even better in person. I listed one on my personal page (not even my Etsy page) and the messages didn't stop. I had more orders than I ever imagined. This design resulted in $600 worth of orders from friends alone - most with local pickup.
$600 in one day!
How they look on a Tree
$600 in one day!
.JPG/:/cr=t:9.68%25,l:0%25,w:100%25,h:80.65%25/rs=w:388,h:194,cg:true)
I sold them for $15 each since they were unpainted, but I would consider $18-$20 if additional work was done - like paintwork. I was able to complete all of these orders in a single day. After I get these out I will start to advertise them with these photos and I anticipate large orders again !
How they look on a Tree
How they look on a Tree
How they look on a Tree

Instantly, one of the nicest ornaments on our tree - and it looks even better in person.
Thank you Robin for this wonderful design !